

1. Safety First
Before you start troubleshooting, always make sure to turn off the power. This keeps you safe from electric shocks or accidental damage.
2. Understand the Circuit
Know how the circuit is supposed to work. This means you should understand where the power comes from, how it flows, and where it goes. A circuit diagram (also called a schematic) is really helpful here.
3. Identify the Problem
Look for obvious signs of a problem:
- Does something look burnt? (like melted wires or components)
- Is there any smell of burning?
- Is a fuse blown or a circuit breaker tripped?
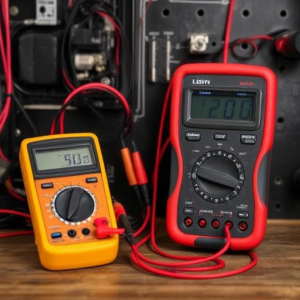
4. Use a Multimeter
A multimeter is a tool that measures electrical values like voltage, current, and resistance. It helps you test different parts of the circuit:
- Voltage (V): Check if power is reaching different parts of the circuit.
- Current (A): Check if the current is flowing through the circuit as expected.
- Resistance (Ω): Measure if there are open circuits (like a broken wire) or if components (like resistors or switches) are working properly.
5. Test Components
Sometimes the problem is in a specific part of the circuit. You can test individual components:
- Resistors: Check for correct resistance.
- Capacitors: Ensure they’re storing and releasing energy.
- Diodes: Ensure they allow current to flow in the right direction.
6. Check Connections
Loose or broken connections are common causes of circuit issues. Make sure all wires, plugs, and terminals are securely connected. Look for broken wires or damaged connectors.
7. Substitute Components
If you’re unsure if a component is faulty, try replacing it with a known working one. This can help you quickly pinpoint the problem.
8. Follow the Flow of Current
Start at the power source and trace the current flow step-by-step. If there’s no voltage at a certain point in the circuit, you know there’s a break somewhere before that point.
9. Look for Short Circuits or Ground Faults
A short circuit happens when two wires that should be separate touch each other, causing a flow of current that’s too high. This can burn out components or blow fuses. A ground fault happens when current flows to the ground unexpectedly, which can be dangerous.
10. Use a Logical Approach
When troubleshooting, always stay organized:
- Isolate: Break the circuit into smaller parts and test each one.
- Check one thing at a time: Don’t test everything at once, or it can get confusing.
- Document: Keep track of what you’ve checked so far and what results you’ve gotten.
11. Test Again
Once you think you’ve found the problem and fixed it, test the circuit again to make sure everything works.
Common Issues to Look Out For:
- Broken wires
- Blown fuses
- Faulty components (resistors, capacitors, etc.)
- Loose or poor connections
Tags: Blown fuses, Broken wires, capacitor testing, circuit analysis, circuit breaker, circuit connections, Circuit diagnosis, Circuit diagram, Circuit flow, Circuit issues, Circuit maintenance, Circuit problem identification, Circuit repair process, circuit troubleshooting, circuit troubleshooting guide., Circuit troubleshooting techniques, component replacement., Component Testing, Component testing steps, current testing, Damaged connectors, Diagnostic steps, Diode testing, electrical circuit, Electrical faults, Electrical measurements, Electrical repairs, electrical safety, Electrical tools, electrical troubleshooting, fault isolation, Faulty components, Ground faults, Identifying circuit issues, loose connections, Multimeter, Multimeter usage, power source, resistance testing, Resistor testing, Safety first, Schematic, Short circuits, Step-by-step circuit testing, Testing circuit components, Testing electrical circuits, Troubleshooting Circuits, Troubleshooting methods, voltage testing